


Complete
This was a time and material project. The owner acquired the game and all the artwork. He needed somebody to do the wrench time. This final Tally will be a little odd for that reason.
No total because this was not a sale, just labor and materials. I am not sure I want to do restoration projects like this again. They are fun but I dread incurring costs for failure like we did on this project. I also don’t feel I have room to make decisions based on sale price.
I know this is David’s last one. He wants to keep them all.
| Item | Cost | Comment |
|---|---|---|
| Labor Rate | 150 | Estimate of time |
| T8 18” 15 watt bulb | 20 | needed 2 and an FS2 Starter |
| Board Repair | 2 | David diagnosed an audio problem and replaced a cap |
| T-Molding | 25 | Had to go for sanding and painting |
| Locks | 15 | Needed 3 |
| bolts | 5 | replacements for missing or damaged bolts in obvious places |
| Paint | 40 | Primer and gloss black |
No total because this was not a sale, just labor and materials. I am not sure I want to do restoration projects like this again. They are fun but I dread incurring costs for failure like we did on this project. I also don’t feel I have room to make decisions based on sale price.
I know this is David’s last one. He wants to keep them all.
Second Art
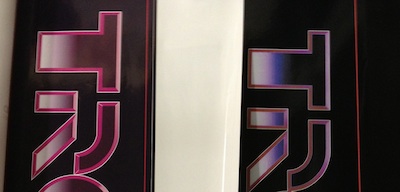
The owner bought a second set of art after the first one failed to adhere and was destroyed by the 3M 80 Spray Adhesive. All art is not created equal. At least both these suppliers had:
- Good thick vinyl substrate
- Good printing technique (Offset or Screen, not inkjet)
- Accurate size
- Good Shipping
Both these sets are good reproductions. One had blacker blacks and better blues. the other had beautiful adhesion, sticky enough to stay once applied, but it was repositionable long enough to apply it.
CPO
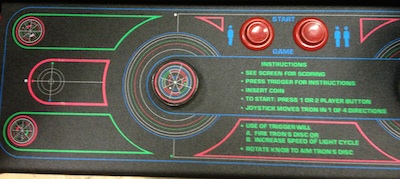
David did an excellent job with the overlay. The Phoenix Arcade reproduction is a thing of beauty. It is beautiful color on thick vinyl. There is not much room for repositioning, this adhesive is strong and quick. It has to take the hands in motion, so this is appropriate and necessary, but it can lead to disaster in the hand of a lesser talent.
The spinner knob decal is printed in the gap for the spinner control. I wish this were given its own die cut because I had to trim it to fit the knob. I used the Xacto knife and the old sticker as a template, but the circular art is not centered so some alignment is needed prior to cutting. This is a beautiful reproduction, just a little room for improvement.
Second Side
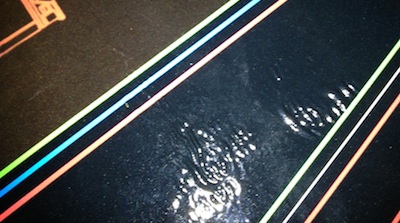
We tried to apply the second side. I was hopeful when it went on smooth and stayed on standing up! We went to work on Battlezone and an hour later the curl began!
We tried the 3M 80 Spray Adhesive again with a much lighter application. Too light, it did not hold it down! 15 minutes later the shrivel started. I am just disgusted with this art, adhesion and recommend solution failure.
Next day the shrivel was less noticeable. Still, it is noticeable. The owner will be getting another set of side art. The budget is shot. The timeline was blown long ago.
I wish I was writing a “How to Successfully Apply 3M 80 to Your Side Art” article. I am not able to do write one. My advice: if it don’t stick, trash it.
Spray Adhesive
Do not use too much spray adhesive or your art will shrivel. The Tron sides were just not sticking. If the machine was standing up, the art would curl and peel off the sides. Time for additional adhesive!
We bought the 3M Spray Adhesive 80 as recommended. I practiced a smooth spray motion. Sprayed the back and smoothed into place. A few moments later we had great looking art. A few moments after that we had destroyed $90 of Tron Side art.
Not a Gallon
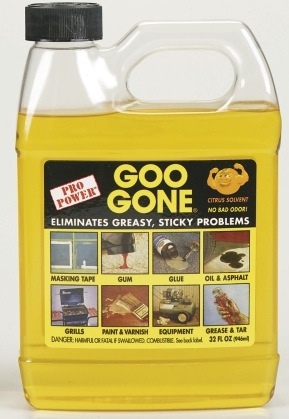
Still stripping goo off the shroud. Yuck! only 4 ounces in, not the 128 predicted.
Shroud Art
I just found reproduction shroud art in the box with the inside art. The shroud needs new art, but I did not include this in the estimate. I need a gallon of Goo Gone to get the old stuff out.
Rebuild Begins
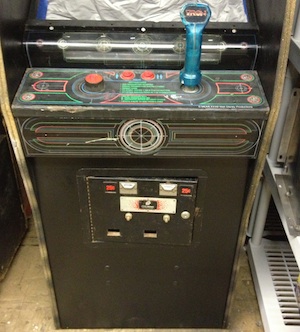
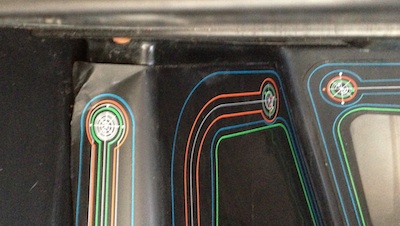
Tron painting is done. The front looks great. We started piecing the control panel lights and segments. The coin door is back on. We need to add a lock to get that thing to stop flopping around and hitting the paint.
I want to smooth some of the rough spots under the paint and touch up before placing the decals. Rick is being very patient on this restore. It will be very nice when he finally gets it back.
Filled and Sanded
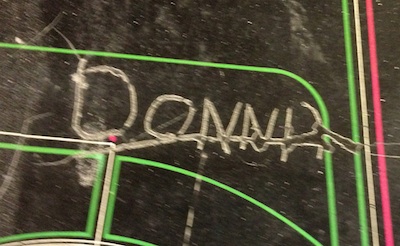
Sorry Donna! Hope the boy who scratched this in loved you longer than this etching. It will be erased!
The scratches were filled with wood putty or Bondo if needed. They dried for a week. We sanded them smooth and are waiting for the paint sprayer to be set up.
Sanded
The cabinet is now free of the old art and ready for new paint.
Stripped
The cabinet is now empty of all parts that should not be painted.
Paint Job
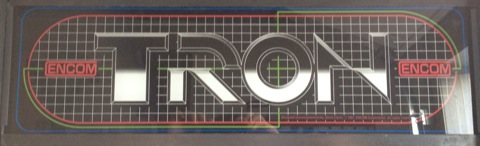
Rick needed this Tron repainted and restickered. He acquired all the artwork, just needed someone to sand, spray and stick. I was wanting to get a sanding and spraying place since my last efforts at this changed the complexion of my wife’s car. She has forbidden the use of the garage for these tasks.
He went all out with the ENCOM replacements. It should be interesting when complete.
I found a place with ventilation and a prayer and compressor. The rent is reasonable. I just needed a project to pay the rent and get me started. This was the project.